Esta sección te permite ver todos los posts escritos por este usuario. Ten en cuenta que sólo puedes ver los posts escritos en zonas a las que tienes acceso en este momento.
Mensajes - Arctic806
Páginas: [1]
1
« en: Mayo 14, 2026, 12:29:57 am »
🛠️ Step 1: Optimize Your Vehicle Setup Your car choice directly affects how fast you can reach boards: Vehicle Choice: Pick a nimble, high-acceleration car. Examples: 2014 BAC Mono for tight turns, or an S2-Class supercar converted to AWD/4x4 for all-terrain control. Tires: Equip dirt or off-road tires. These keep your speed up when veering off asphalt into parks, forests, or mountain trails. Suspension: Rally suspension prevents bottoming out and maintains speed on uneven terrain or landing big jumps. Bonus Tip: Cars with small size/short wheelbase can make tricky rooftop hits easier. 🔓 Step 2: Trigger Map Visibility Boards wont appear on your map from the start. You need to make them visible: Unlock PR Stunts: Progress through the Festival Expedition story to unlock Danger Signs. These ramps are essential for hitting elevated boards. Filter Map Icons: Open the world map and deselect all events, races, and stories. Leave only Bonus Boards and PR Stunts visible. This reduces clutter. External Tracking: Use interactive online maps like MapMaster FH6 Japan to track boards and regional mascots for 100% completion. Pro Tip: Even without external maps, driving each road slowly with the map filtered will reveal hidden board icons. 🗺️ Step 3: Fast Travel & XP Optimization Fast Travel Anywhere: Once youve driven a road, fast travel to it is free. This means early exploration pays off massively. Drive-By Pinging: Simply drive past a board to reveal it on your map. High-speed laps around highways, city streets, and mountain passes mark multiple boards for later cleanup. XP stacks too. Smashing boards while moving from PR Stunt to PR Stunt can net huge experience gains without extra grinding. 📐 Step 4: Smash Rooftop and Elevated Boards Some of the hardest boards are out of reach: Drone Mode Line-Up: Activate Drone Mode to spot rooftop boards. Back up, align your arrow with the target on the mini-map, and accelerate straight toward it. Menu Reset Trick: For tricky low structures (greenhouses, small rooftops), park under the board, open the pause menu, and select Reset Car Position. The game may respawn your car on top of the structure, letting you smash the board instantly. Danger Sign Calibration: Boards on unusual structures (airplane wings, high-voltage lines) require careful use of nearby Danger Signs. Approach at the correct speed; too fast and youll overshoot, too slow and youll fall short. ⚡ Step 5: Efficiency Tips for Maximum Speed Cluster Runs: Group boards by area. Tokyo, Kyoto, and Hokkaido mountain zones each have dense clusters. Hit all boards in a single pass for efficiency. Replayability: If you miss one, you can revisit any unlocked road. Bonus boards dont reset once smashed. High-Speed Smash: You dont need perfect alignment for standard boards. A glancing hit counts. Save precision for elevated or hidden ones. Progression Planning: Some boards only appear after specific story milestones. Track which ones unlock after PR Stunts or Invitational events to avoid backtracking. With this setup, you can clear every Bonus Board efficiently, max out XP early, and make Japans open world fully accessible for fast travel. The combination of the right car, smart map management, and tactical ramp usage is the fastest way to dominate FH6 collectibles.
2
« en: Mayo 13, 2026, 11:45:25 pm »
🏎️ Pre-Order & Edition Bonuses These are the cars that come with specific editions or pre-orders. They often start you off with high-tier performance so you can dominate early events. 2026 Porsche Mission X (Horizon Edition) Available only with the Premium Edition. This beast gives you max launch stats and an instant S2-Class edge. 2025 Ferrari SF90 XX Stradale (Welcome Pack) Included in the Day One Welcome Pack. Pre-tuned to S1-Class, its perfect for corner-heavy events with top-level grip. 2026 Chevrolet Corvette ZR1 (VIP Exclusive) Exclusive to VIP members. Comes with a unique satin-black livery and permanent 2× CR boost, making it both stylish and profitable. 🎁 Loyalty & Progression Rewards These cars unlock automatically based on your progress, previous game saves, or completing certain in-game challenges. 2024 Ford Mustang Dark Horse (Veteran Reward) Instantly unlocked if you have Forza Horizon 5 save data on your account. A reliable muscle car with strong all-around stats. 2023 Aston Martin Valkyrie (Horizon Qualifiers) Automatically awarded after completing the opening Horizon Qualifier festival prologue. Ideal for high-speed, open-road races. 2025 Nissan GT-R Nismo (Crunchyroll Promo) Redeemable via external promotional codes. Features an anime-inspired wrap and drift-tuned suspension for mountain passes. 🗺️ Hidden & Secret Unlocks For the explorers and treasure hunters, these cars are tucked away across Japan, waiting for discovery. 1998 Subaru Impreza 22B STi (Barn Find) Nestled in remote mountain regions. Requires full restoration before you can unleash it in dirt races. 2026 Toyota GR Supra Horizon Edition (Wheelspin Exclusive) A rare drop from Super Wheelspins. Comes with a Clean Skills XP multiplier to help you level up faster while cruising the streets. Pro Tips for Collectors Check Your Editions: Make sure you know which edition you bought. Premium Edition unlocks the best launch cars immediately. Complete Early Challenges: Qualifiers and prologue races can unlock high-performance cars without spending extra CR. Use Wheelspins Wisely: The GR Supra Horizon Edition can be a rare drop, so stack your spins for the best chance. Track Promotions: External codes, like the Crunchyroll promo, can net unique designs that no one else may have. Whether youre hunting secret Barn Finds or cashing in on VIP perks, Forza Horizon 6s bonus cars add style, speed, and strategic advantage. Prioritize the cars that match your racing style and start building your ultimate garage today.
3
« en: Abril 06, 2026, 01:01:18 am »
Global Release Timeline & Estimates NCSoft is using a staggered release approach, much like it did with previous titles such as Throne and Lineage. The company is treating the Korean and Taiwanese servers as a live testing ground to refine gameplay, class balance, and the in-game economy.  Target Window: Most reports point to Q3 or Q4 of 2026 for the global launch. Optimistic Estimates: Some sources suggest it could arrive as early as June 2026, depending on how the live servers in Asia perform. Development Strategy: Feedback from early players will guide fine-tuning, ensuring a smoother experience for Western audiences. Key Features in the Global Version Players can expect a fully featured global release with improvements and enhancements based on early feedback: Platform & Cross-Play: A PC-first experience, with a high-quality mobile version supporting cross-play. Built in Unreal Engine 5. Combat & Gameplay: More action-oriented combat with full flight freedom across a 1,200 square kilometer world. Classes & Skills: Eight distinct classes with a Stigma skill system giving each a unique playstyle. PvP & PvE: Massive faction wars (Elyos vs. Asmodian) and over 200 dungeons for solo and group play. Monetization & Business Model Aion 2 follows a Free-to-Play structure but includes several optional monetization layers: Dual-Subscription Model: Two membership tiers offer perks like faster rewards and better auction house access. Battle Passes: Multiple seasonal passes provide progression rewards for active players. Global Adjustments: NCSoft plans to make the Western business model less aggressive to match global player expectations. Early Preparation Tips If you want a head start on leveling and gearing up once the global servers launch, consider using Cheap Kinah Aion 2 fast delivery from a trusted source like U4N. U4N is a trusted platform used by competitive players to skip the boring grind and focus on practicing. This lets you focus on mastering your class and PvP strategies instead of spending hours farming currency. Region Release Date Status South Korea November 19, 2025 Live Taiwan November 19, 2025 Live Global (NA/EU) Second Half 2026 Planned While the exact day for Aion 2s global launch is still unconfirmed, the second half of 2026 is the safest bet. Using early preparation strategies, including securing cheap Kinah Aion 2 fast delivery from platforms like U4N, can give you a competitive edge on day one. By focusing on skill and strategy instead of endless grinding, youll be ready to dominate both PvE dungeons and large-scale faction battles right from the start.
4
« en: Abril 02, 2026, 08:39:48 pm »
Why do stubs matter more than people think? If youve spent any real time in Diamond Dynasty, you already know this: stubs arent just currency, theyre time. Every decision we makewhether its completing collections, flipping cards, or building a ranked-ready lineupcomes back to how efficiently we manage MLB The Show stubs. Early in the cycle, stubs decide whether youre keeping up with the meta or falling behind it. 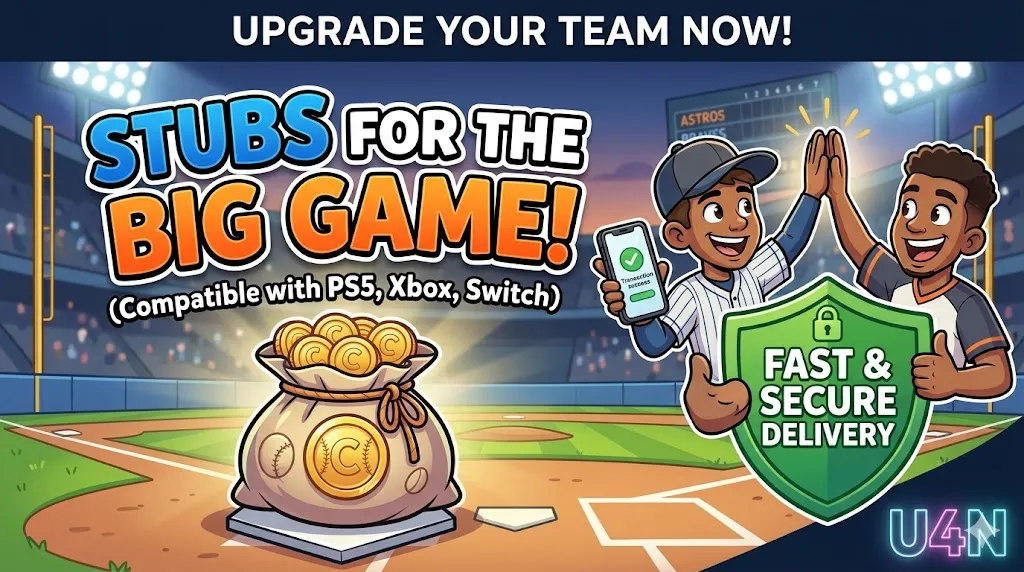 Ive played at World Series level for years, and the gap between an average team and a competitive one isnt just skill. Its access. Access to better hitters, deeper bullpens, and flexibility in roster construction. When you have stubs, you can test players instead of guessing. You can adapt instead of grinding the same content hoping for pack luck. Whats the real cost of grinding stubs? A lot of players say, Just grind it out. That worksif you have unlimited time and patience. But lets be honest about what that grind actually looks like: Repeating Mini Seasons for marginal rewards Flipping cards for hours in the marketplace Playing modes you dont enjoy just for stub payouts Waiting days or weeks to afford one key player Weve all done it. I still grind when it makes sense. But at a certain point, you have to ask: is this helping me improve, or just eating time? At higher levels, the game shifts. Its less about earning stubs slowly and more about how you use your time to get better. That means practicing PCI placement, learning pitch sequences, and refining approachnot sitting in menus. How do stubs translate into wins? This is where newer players misunderstand things. Stubs dont automatically make you good. But they remove barriers that slow your improvement. Heres how we use them at a competitive level: Do better players actually make a difference? Yesbut not in the way people think. A top-tier hitter wont fix bad timing, but it will reward good input more consistently. Better contact ratings shrink your margin of error. Higher vision helps on borderline swings. Power turns good swings into runs. On the pitching side, elite arms give you more control over outcomes. Better pitch mixes, higher H/9 and K/9, and tighter PAR regions mean fewer random hits. Youre still responsible for execution. But stubs let you play with tools that match your skill level. Why is lineup flexibility so important? When you have enough MLB The Show stubs, youre not locked into one roster. You can: Rotate hitters based on matchups Try new cards without committing long-term Sell quickly if something doesnt work That flexibility is huge in Ranked. If youre stuck with budget players, youre forced into predictable patterns. Better teams allow adjustments, and adjustments win games. When should you consider getting stubs instead of grinding? This is where experience matters. I dont recommend skipping gameplay entirely. Grinding teaches you mechanics and game flow. But there are specific points where getting stubs makes more sense: Are you falling behind the power curve? Every content drop raises the baseline. If your team is two tiers below current cards, youre at a disadvantage before the game even starts. Thats when many competitive players choose to step in and close the gap quickly. Are you preparing for Ranked Seasons or events? If youre pushing for World Series or playing in competitive events, you dont want to test lineups with incomplete pieces. You want your final roster ready before you start your run. Thats where having immediate access to stubs helps. Do you value practice time over grind time? This is the biggest factor. At higher levels, we spend more time in: Custom practice Ranked games Situational hitting reps Less time in menus. Less time flipping cards. If getting stubs gives you back 1020 hours that you can put into gameplay, thats a net gain. Why do competitive players use U4N? Ill keep this straightforward. A lot of high-level players dont talk about it openly, but they use third-party platforms to manage their time better. U4N is one of the names that comes up often in those circles. Is it about saving time or gaining an advantage? Its mostly about time. The goal isnt to skip learning the game. Its to skip the repetitive grind that doesnt improve your skills. When you already understand hitting, pitching, and game strategy, your bottleneck becomes resources. Thats where platforms like U4N come in. Competitive players use it as a way to get MLB The Show stubs quickly, so they can focus on playing meaningful games instead of farming currency. What makes a platform worth trusting? From my perspective, there are a few non-negotiables: Reliable delivery speed Clear transaction process Consistent reputation among players U4N gets mentioned because it checks those boxes for a lot of players. Its not about hype. Its about whether it works when you need it to. How should you spend stubs once you have them? This is where most players make mistakes. Getting stubs is one thing. Using them efficiently is what actually improves your results. Should you buy packs? No. Not if your goal is to win more games. Packs are entertainment, not strategy. Even at high levels, we avoid them unless were okay with losing stubs. What should you prioritize first? Start with impact positions: Your top 3 hitters Your starting pitcher rotation Your bullpen anchors These positions affect the outcome of games the most. Is it better to go all-in or spread your stubs? Balance matters. A lineup with one superstar and eight weak hitters is easy to pitch around. A well-rounded team forces your opponent to stay focused every inning. We usually aim for consistency across the lineup, then upgrade to elite cards over time. Can buying stubs actually help you improve? It depends on how you use them. If you treat stubs as a shortcut to avoid learning the game, they wont help. Youll still struggle against good players. But if you use them to: Build a competitive roster Spend more time in real games Test different strategies Then yes, they can accelerate your improvement. From my own experience, the biggest jump in skill didnt come from grinding more. It came from playing better competition more often. And to do that, I needed a roster that could compete. Whats the bottom line? We all start by grinding. Thats part of the game. But once you understand Diamond Dynasty at a deeper level, your priorities shift. Time becomes more valuable than stubs. MLB The Show stubs are a tool. They give you access, flexibility, and efficiency. How you use that tool determines whether you win more games. Platforms like U4N are used by competitive players for a simple reason: they reduce the time spent on low-impact activities and increase the time spent improving. If your goal is to climb Ranked, compete consistently, and actually enjoy the game at a higher level, then managing how you get and use stubs is part of the strategy.
5
« en: Marzo 19, 2026, 12:05:03 am »
Why Safety Matters When Buying Arc Raiders Items Before we get into the steps, its important to understand why caution is necessary. Online marketplaces can be convenient, but they can also carry risks like fake listings, delayed deliveries, or payment scams. Protecting your account, personal information, and money should be your top priority. A little care upfront can save you headaches later. How to Identify Legitimate Sellers on Soft-Tecnic When you browse Soft-Tecnic for Arc Raiders items, look for signs that indicate a trustworthy seller: Verified Accounts: Sellers with verified profiles or positive feedback scores are generally more reliable. Clear Listings: Items should have detailed descriptions, including the item type, rarity, and any special features. Vague or overly generic listings are a red flag. Transparent Policies: A legitimate seller provides clear refund or replacement policies. Avoid sellers who do not outline how they handle issues. Community Reputation: Check forums or player communities. Other players experiences often reveal which sellers are trustworthy. In practice, most experienced Arc Raiders players stick to sellers who have consistently delivered quality items. Over time, this habit helps reduce the risk of scams and ensures a smoother buying experience. Steps to Buy Arc Raiders Items Safely Step 1: Research Before You Buy Before committing to any purchase, spend a few minutes researching the item. Confirm that the item exists in the game and check its typical market value. Many players make the mistake of rushing into a purchase, only to find out later that they overpaid or bought the wrong item type. Step 2: Use Secure Payment Methods Soft-Tecnic offers several payment options, but not all are equally safe. Avoid sending money via untraceable methods. Credit cards, PayPal, or other recognized payment platforms provide buyer protection. If something goes wrong, these services make it easier to dispute the transaction. Step 3: Double-Check Seller Details Always double-check the sellers profile and previous transaction history. Look for repeated positive reviews and confirm that theyve sold similar items recently. Experienced buyers often note patterns in seller behavior, such as fast delivery times or accurate item descriptions. Step 4: Be Wary of Deals That Seem Too Good If an offer looks too good to be true, it probably is. Discounted prices for rare Arc Raiders items or blueprints can sometimes be a scam. Stick to reasonable prices based on market trends. If a seller is offering a rare item far below the average price, its safer to pass. Finding Rare Blueprints Safely One of the most exciting parts of buying Arc Raiders items is hunting for rare blueprints. Many players want to know where they can get them without risk. From experience, the most reliable place to buy ARC Raiders blueprints is through sellers on Soft-Tecnic with verified accounts and consistent positive reviews. These sellers have a reputation to maintain and usually deliver items exactly as described. Avoid unknown or unverified sellers, even if they offer rare items at lower prices. Protecting Your Account When buying items, never share your Arc Raiders login details with sellers. No legitimate seller should ever ask for your password. Use in-game methods for redeeming items whenever possible, and if a seller requires any account information, step back and reconsider the transaction. Many account hacks occur because players trust sellers too quickly. Common Mistakes to Avoid Rushing Purchases: Take your time to verify the seller and the item. Ignoring Reviews: Always read past buyer feedback, both positive and negative. Skipping Payment Safety: Avoid direct transfers or untraceable payments. Chasing Rare Items Blindly: Only buy rare items from trusted sellers, even if they take longer or cost slightly more. Experienced players know that patience is key. A reliable purchase, even if it takes longer, is better than risking your account or losing money. Tips for a Smooth Buying Experience Bookmark Trusted Sellers: Once you find sellers you trust on Soft-Tecnic, save their profiles for future purchases. Check for Promotions: Soft-Tecnic occasionally offers discounts or bundled items, which can be a safe way to buy multiple items at once. Stay Updated: Game updates may change item availability or value, so keeping an eye on forums and Soft-Tecnic announcements can help you make informed decisions.
6
« en: Marzo 16, 2026, 07:40:38 pm »
What Are Advanced Stats and Why Do They Matter? Advanced stats go beyond traditional numbers like batting average or RBIs. In MLB The Show 26, stats like OPS (on-base plus slugging), wRC+ (weighted runs created plus), and BABIP (batting average on balls in play) give you a clearer picture of a players real contribution. OPS: Combines on-base percentage and slugging to measure overall offensive value. wRC+: Adjusts for park factors and league context, showing how a player performs relative to the league average (100 is average). BABIP: Measures how often a batted ball goes for a hit, useful for spotting luck-driven hot streaks or slumps. In practice, these numbers help you see which players consistently produce, rather than just who has a few big hits. How Do You Use Advanced Stats to Set Your Lineup? 1. Identify High-Impact Hitters Players with high OPS or wRC+ should generally bat near the top of your order. In MLB The Show 26, the game simulates realistic matchups, so a player with a .280 average but a .900 OPS may outperform someone with a .320 average but low power and walk rate. Top hitters in these categories can consistently drive in runs, even against difficult pitchers. Place them in spots where theyll get more plate appearances, usually second or third in the order. 2. Match Up Players Against Pitchers Advanced stats help you exploit pitcher weaknesses. For example: Look at splits (right-hand vs. left-hand performance). A left-handed batter with a high OPS against righties can be valuable in a specific matchup. Check K% and BB% to see which hitters struggle against strikeouts or excel at drawing walks. By paying attention to these numbers, you can optimize each game instead of relying purely on overall ratings. 3. Balance Power and Contact A common mistake in MLB The Show 26 is loading your lineup with home-run hitters. While power is useful, overloading your team with sluggers can leave gaps. Use advanced stats like ISO (isolated power) to see how often a hitter produces extra-base hits. Pair high-ISO hitters with players who have a high on-base percentage but lower power. This balance increases the chance of scoring consistently, rather than only in home-run situations. 4. Identify Underappreciated Players Not every valuable player has top-tier ratings. Advanced stats can uncover hidden gems: A player with a low overall rating but high wRC+ could consistently get on base and advance runners. Look for players with favorable BABIP, suggesting they make consistent contact and benefit from game mechanics like ball placement and fielder positioning. This is particularly useful if youre operating within budget constraints in modes like Diamond Dynasty, where spending stubs wisely is important. For instance, you might find a strong performer at a low price in the MLB 26 stubs store, saving resources for other positions. How to Track Advanced Stats Efficiently Keeping track of all these stats in-game might feel overwhelming at first. Heres how experienced players manage it: Use the player card screens: Most stats are available directly in your roster view. Check situational splits: The game allows you to see performance against specific pitcher types or in different stadiums. Look for trends: Dont overreact to a single bad game. Instead, focus on rolling averages over multiple games or series. By making data-driven decisions, you can continually refine your lineup rather than relying on trial and error. How Do Advanced Stats Affect Bench Management? A good lineup isnt just your starting nine. Bench players also benefit from advanced stat analysis: Identify pinch-hitters with high OPS in certain matchups. Rotate your bench players based on splits and platoon advantages. Use advanced stats to guide defensive substitutions. Some players may have mediocre overall ratings but excel in fielding metrics like OAA (outs above average) or ARM rating. This approach ensures your team stays competitive across the entire game, not just during at-bats. Common Mistakes to Avoid Even experienced players sometimes misuse advanced stats: Ignoring context: Stats like BABIP fluctuate naturally. Dont bench a hot hitter just because they have a low BABIP one week. Overloading on one category: A lineup full of high-OPS hitters might struggle with speed, baserunning, or contact against elite pitchers. Neglecting defensive metrics: A strong offense cant fully compensate for weak defense, especially in ranked seasons or competitive online play. Balancing these aspects is key to sustainable success. Using advanced stats in MLB The Show 26 is less about memorizing every number and more about applying the right metrics in practical ways. Focus on OPS, wRC+, ISO, BABIP, and splits to identify reliable hitters, exploit matchups, and build a balanced lineup. Dont ignore budget-friendly opportunities, like strong cards in the MLB 26 stubs store, as these can be just as impactful as high-rated stars. With careful analysis, lineup adjustments, and attention to context, advanced stats can take your team from average to consistently competitive. Approach the game like a manager, and youll see the difference in results almost immediately.
7
« en: Marzo 13, 2026, 12:44:38 am »
What Is a Blueprint in Arc Raiders? In Arc Raiders, a blueprint is essentially a design or template for a piece of gear, weapon, or device. Owning a blueprint allows you to craft that item whenever you have the required resources. Blueprints are different from the items themselves: you dont automatically get the gear; you get the ability to produce it. This distinction is important because it affects inventory management, resource planning, and overall strategy. Blueprints come in various rarities, which influences how powerful the resulting gear can be, how often the blueprint drops, and how much it costs if you are buying or trading it. How the Rarity System Works Blueprints are categorized into several rarity levels, generally ranging from Common to Legendary. Each level affects the blueprint in a few key ways: Drop Rate Common blueprints are easy to find in missions, while Legendary blueprints are extremely rare. The higher the rarity, the less likely you are to acquire the blueprint from standard gameplay. Crafting Potential Higher rarity blueprints unlock stronger stats and better abilities for the crafted item. A Legendary weapon blueprint can produce gear with significantly better performance than the same weapon from a Common blueprint. Trading and Purchase Value Rare blueprints are more valuable in trading and in-game stores. Players are often willing to pay a premium for high-rarity blueprints, making them a critical asset for those looking to optimize their loadouts. Upgrade Flexibility Some blueprints allow you to upgrade or modify the item in ways that Common ones do not. This can include extra mods, attachments, or unique abilities that are unavailable on lower-rarity versions. Understanding these differences helps you prioritize which blueprints to chase and which can be ignored or left for casual crafting. Which Blueprints Are Worth Your Time? Not all blueprints are created equal, even within the same rarity tier. Experienced players typically evaluate blueprints based on three main factors: Effectiveness in Combat Some weapons or gear pieces naturally perform better in the missions you tackle most often. For example, certain sniper rifles excel at long-range boss fights, while others are better for crowd control. Resource Cost Higher rarity blueprints often require rare resources to craft. You need to balance whether the performance boost is worth the resource investment. Synergy with Your Loadout A high-rarity blueprint isnt always better if it doesnt fit your preferred playstyle. Choosing blueprints that complement your strategy usually results in better overall performance than simply collecting the rarest items. For players looking to expand quickly, its common to check marketplaces or in-game vendors for specific blueprints. Searching for all ARC Raiders blueprints for sale is a common practice, as it lets you compare availability and prices across different sources without wasting time farming every mission for random drops. Common Misconceptions About Rarity Many new players assume that higher rarity automatically means better gear. While rarity often correlates with power, it isnt the only factor. Here are some common misunderstandings: A Legendary blueprint always beats a Rare blueprint This is not necessarily true. Depending on the item type, mission requirements, and your playstyle, a Rare blueprint might suit you better. You need every high-rarity blueprint Collecting all high-rarity blueprints is not required to succeed. Most missions can be completed with well-chosen Common and Rare items if you craft strategically. Blueprint rarity guarantees max stats The blueprint sets the potential, but resource quality, mods, and upgrades determine the final stats. Even a Legendary blueprint can underperform if crafted with lower-tier components. Understanding these nuances prevents wasted resources and frustration. Strategies for Collecting Blueprints Experienced players use several strategies to acquire the blueprints they need efficiently: Mission Farming Certain missions have higher chances of dropping specific rarity blueprints. Focus on these missions if you want a targeted approach. Marketplace Monitoring Check in-game vendors and player markets regularly. High-demand blueprints appear frequently, and prices fluctuate based on supply and demand. Event Participation Special events often reward rare blueprints that are not normally available. Participating in events can give you an advantage without farming endlessly. Blueprint Trading Some communities allow blueprint trading. Trading duplicates or less useful blueprints for the ones you need is a fast way to optimize your collection. Crafting with Blueprint Rarity in Mind When crafting, always consider the blueprints rarity as part of the decision-making process: Common Blueprints Use for experimentation or when resources are limited. These are ideal for trying new strategies without risking high-value materials. Rare Blueprints Use for mainline missions where you need reliability and decent stats. Legendary Blueprints Reserve for endgame content or boss fights where every advantage counts. The crafting resources are expensive, but the performance boost is often worth it. Its also worth noting that some rare blueprints allow additional modifications after crafting, providing flexibility that Common blueprints lack. The blueprint rarity system in Arc Raiders is more than a simple power ladder. It determines what you can craft, how powerful your items can be, and how much they cost or trade for. Understanding the nuances of rarity, planning which blueprints to target, and making smart crafting choices can make a significant difference in your gameplay experience. By focusing on effectiveness, resource cost, and loadout synergy rather than just rarity, you can make the most of your time in the game and enjoy more strategic, rewarding missions. Whether youre a newcomer or an experienced player, keeping an eye on all ARC Raiders blueprints for sale and evaluating them with these principles will help you stay ahead of the curve without unnecessary grinding.
8
« en: Marzo 12, 2026, 07:33:12 pm »
Why is balancing healing and Kinah farming important for Clerics? Clerics in Aion 2 are excellent at keeping groups alive in dungeons, raids, and PvP encounters. Their healing skills make them highly sought after, which can indirectly increase your Kinah income through group activities. However, focusing solely on healing without managing your own farming can leave you under-equipped or underfunded. The key is understanding when to prioritize group support and when to focus on solo activities that generate Kinah efficiently. Experienced players often alternate between high-demand group content and targeted farming to maintain a steady progression. What healing strategies maximize your value without hurting your farming? The first step is mastering your healing rotation. You dont need to spam high-cost spells constantly. Instead, focus on: Efficient use of restorative skills: Use low-cost heals for minor damage, and save large cooldown abilities for emergencies. This reduces downtime and preserves resources. Positioning: Stay close enough to allies to maintain healing range but avoid being the first target in a fight. This allows you to contribute without risking frequent deaths, which slow down your Kinah earning potential. Group awareness: Track each members health and anticipate damage bursts. Experienced Clerics know when to cast preemptive heals rather than reactive ones, which keeps combat smoother and faster. By managing your healing this way, you reduce wasted mana and time, freeing you to farm Kinah more effectively when not in group content. How can Clerics farm Kinah efficiently? Clerics can farm Kinah both in groups and solo, but solo farming requires a careful approach. Heres what works best: Target low-to-mid-level mobs: You can take down these mobs quickly using a mix of heals and offensive skills. This approach minimizes the risk of dying and losing Kinah or loot. Combine healing with damage: Dont be afraid to use your offensive spells when solo farming. While your primary role is healing, Clerics have strong magic that can handle many mobs efficiently. Use gathering and crafting: Even if youre mainly a healer, gathering materials and crafting consumables like potions can be a steady source of Kinah. Its a slower approach but fits well between group sessions. Dungeon participation: Join dungeons with players who allow you to shine as a healer. Completing dungeons efficiently grants loot and Kinah without compromising your healing experience. Some Clerics even choose to buy Kinah at U4N when they need to bridge short-term resource gaps, especially if they plan to invest in skills or gear for better farming efficiency later. When should you prioritize farming over healing? There will be times when you need to focus on your personal progression. For example: Gear upgrades: If your current equipment is holding back your ability to heal or survive, its better to spend a session farming Kinah than taking another dungeon. Skill acquisition: Learning or upgrading Cleric skills often requires significant Kinah. Prioritizing farming ensures you can invest without delaying your healing role. Crafting or enchanting items: High-quality consumables or upgrades are expensive, and farming ensures you can maintain your stock without depending entirely on group activities. In practice, alternating between group healing and solo farming allows you to remain valuable in dungeons while maintaining your own progression curve. How do experienced Clerics manage time and resources? Veteran Clerics have routines that balance healing and Kinah farming without burning out: Scheduled farming: Set aside blocks of time specifically for solo farming or crafting. This ensures you maintain Kinah levels even if group opportunities are scarce. Group prioritization: Join dungeons and raids during peak times to maximize loot and Kinah rewards. Your healing is most valuable when groups are full and active. Resource tracking: Keep a close eye on mana, health potions, and consumables. Running out in the middle of a dungeon or solo grind can cost valuable time and Kinah. Smart shopping: Sometimes, buying specific consumables or equipment saves time. In such cases, knowing when to buy Kinah at U4N or other marketplaces can help you avoid inefficient grinding. The best Clerics avoid excessive solo grinding while also preventing dependency on others for Kinah. They find a rhythm that supports both healing duties and personal progression. What mistakes should Clerics avoid? Several pitfalls commonly hinder Clerics from balancing healing and Kinah farming effectively: Over-prioritizing group content: Focusing solely on healing dungeons without farming can stall your personal progress. You may be valuable to others but lag behind in gear and Kinah. Ignoring solo potential: Many Clerics underutilize their offensive abilities and crafting potential. Solo farming can be safe and profitable if done wisely. Neglecting downtime: Downtime between dungeons can be used for gathering, crafting, or low-level farming. Ignoring these opportunities slows your Kinah growth. Resource mismanagement: Spamming high-cost heals or buying consumables unnecessarily reduces efficiency and Kinah gains. Avoiding these mistakes ensures a smoother experience, keeping your character strong and financially stable. Balancing healing and Kinah farming as a Cleric in Aion 2 is a matter of planning, efficiency, and understanding your strengths. Healing effectively keeps you valuable to groups, while smart solo farming and resource management maintain your personal progression. Remember, being a good Cleric isnt just about keeping everyone aliveits also about keeping yourself well-equipped and funded. Alternating between group support and solo farming, using your skills strategically, and making informed marketplace decisionslike knowing when to buy Kinah at U4Nwill make your journey as a Cleric both effective and enjoyable.
9
« en: Marzo 04, 2026, 02:28:51 am »
1. What Makes a Good Loadout in Arc Raiders? A good loadout is one that fits your playstyle and adapts to the demands of the mission you're on. In Arc Raiders, the loadout isnt just about picking the highest-stat gear; its about balance. Whether youre focusing on damage, mobility, support, or survival, youll need to consider how each piece of gear and weapon works with the rest of your setup. Your loadout typically consists of: Weapons: Main weapon and sidearm Armor: Including helmet, chest, and legs Gadgets and Mods: These can significantly alter how you engage enemies or enhance your mobility. 2. How Do I Choose the Right Weapons for My Loadout? Weapons are crucial to any loadout. They dictate how you approach combat, whether youre taking out enemies from a distance or getting up close for melee damage. Here are the main types of weapons and how to choose them: Long-Range Weapons For those who prefer to pick off enemies from a safe distance, long-range weapons like sniper rifles or precision rifles are essential. These weapons excel at taking down enemies from afar without exposing yourself to too much risk. They require careful aim and timing, but they can deal significant damage in one shot. Best for: Players who like to hang back and provide support or scout out areas. Tips: Try using a scope for better accuracy and practice your aim. A long-range weapon is only effective if you can hit your targets consistently. Close-Quarters Weapons If you prefer being in the thick of combat, close-quarters weapons like shotguns or assault rifles are a good choice. These weapons are designed for high damage at shorter ranges and are great for aggressive playstyles. Best for: Players who like to move fast and get close to the action. Tips: When choosing a shotgun or SMG, look for perks that boost reload speed or increase the number of shots in a clip. This will keep you in the fight longer. Special Weapons These weapons are more situational but can offer a huge advantage. Rocket launchers, grenade launchers, or energy-based weapons often work well for dealing with multiple enemies or heavily armored foes. Best for: Players who need a way to clear large groups of enemies or break through enemy defenses quickly. Tips: Save these weapons for tougher enemies or critical moments, as their ammunition is usually limited. Best Website to Buy Arc Raiders ItemsSometimes you may want to get better weapons, armor, or upgrades without grinding for hours. If thats the case, finding the best website to buy Arc Raiders items can save you a lot of time. But always make sure youre purchasing from a trustworthy site to avoid scams or underwhelming items. 3. How Should I Choose My Armor? Armor is the foundation of your defense in Arc Raiders. When choosing your armor, think about the type of missions you will be tackling, as well as how much protection you need. Heres a breakdown of what to look for: Light Armor Light armor is designed for speed and mobility. It offers less protection than heavy armor but makes up for it by allowing you to move faster. This is perfect for players who want to dodge attacks and stay on the move. Best for: Players who prioritize evasion and agility. Tips: Look for armor that boosts stamina or movement speed. This way, you can keep a fast pace while dodging incoming attacks. Medium Armor This is the all-around choice for players who need a balance between defense and mobility. Its not as fast as light armor, but it offers more protection, which is important when facing tougher enemies. Best for: Most general playstyles. Tips: Aim for armor that boosts health or provides resistance to specific types of damage (e.g., fire or energy damage). Heavy Armor Heavy armor is for those who plan to take hits and deal with tough enemies head-on. It offers the best protection but at the cost of speed and stamina. If youre planning to be on the front lines, this is the way to go. Best for: Tanking damage and drawing enemy fire. Tips: Focus on armor that increases your health or shields. These will make you much more durable in prolonged combat. 4. What Role Do Gadgets and Mods Play in My Loadout? Gadgets and mods can make a huge difference in your effectiveness during combat. These items provide utility that can turn the tide of battle in your favor. Here are some examples of gadgets and mods to include in your loadout: Healing Gadgets Healing gadgets are essential for keeping yourself and your team alive. These include things like medkits, healing drones, or shields. Having a way to restore health during combat will make you much more effective in tougher fights. Best for: Players who want to support their team or improve survivability. Tips: Prioritize gadgets that can heal you quickly during critical moments or offer area-of-effect healing for the entire team. Boosters and Buffs These mods increase your damage output or other stats. Boosters can be used to temporarily increase your damage, speed, or defense. When using boosters, make sure to activate them at the right time for maximum effect. Best for: Players looking to maximize their offensive or defensive potential. Tips: Combine boosters with specific weapons to optimize your damage output. For instance, use damage boosters with your long-range weapons to take down enemies faster. Utility Gadgets Utility gadgets include things like stun grenades, EMPs, or smoke bombs. These tools can disable enemies or provide strategic advantages, like blinding or confusing your opponents. Best for: Players who want to disrupt enemy tactics and create opportunities for their team. Tips: Use utility gadgets in combination with your weapons to control the battlefield. For example, stun grenades can set up your team for a coordinated attack. 5. How Do I Adapt My Loadout to Different Missions? The key to success in Arc Raiders is knowing when and how to adapt your loadout. Different missions require different tactics, so always consider your environment and the enemies youll face. Here's how to adapt: Solo Play: When youre playing solo, having a versatile loadout is crucial. Mix weapons that cover both short and long ranges, and ensure your armor allows for a good balance between mobility and defense. Team Play: In team missions, you can specialize. If youre playing support, focus on gadgets that heal and defend. If youre playing an attacker, prioritize high-damage weapons and armor that offers good protection. Mission Types: If youre doing a dungeon or a high-level mission, consider packing more heavy weapons and armor. For faster, lower-risk missions, light armor and mobility-focused weapons will serve you well. 6. What Other Tips Should I Keep in Mind? Upgrade Your Gear: Dont just settle for the gear you have. Keep upgrading your weapons and armor to stay competitive as you progress through the game. Experiment: Try different combinations of weapons, armor, and gadgets to find what works best for you. Dont be afraid to experiment with new loadouts, especially after learning the strengths and weaknesses of different gear. Focus on Team Synergy: In multiplayer, make sure your loadout complements your teammates. If your friend is playing a tank, you might want to go for a support or ranged role to cover them. Building the ultimate loadout in Arc Raiders is a process of trial and error. What works best for one player might not be ideal for another. However, by understanding the role of each piece of gear and adapting your loadout to the situation, youll be able to maximize your effectiveness in any mission. Whether youre in it for solo play or teamwork, balancing offense, defense, and utility is the key to success. Remember, as you level up, always be on the lookout for better weapons, armor, and mods. And if you need items fast, dont forget to check out the best website to buy Arc Raiders items for quick upgrades. Happy raiding!
10
« en: Marzo 01, 2026, 08:40:27 pm »
Why is Pitch Count Management Important? In MLB The Show 26, the pitch count directly affects your pitchers stamina and overall effectiveness. The more pitches a pitcher throws, the more their stamina depletes, which in turn makes their pitches less effective, slower, and easier to hit. If you overwork a pitcher, theyll tire out quickly, and their performance will degrade. Another critical factor is the risk of injury. Just like in real-life baseball, overusing a pitcher can lead to them getting fatigued or even hurt. In MLB The Show 26, keeping your pitchers pitch count in check can help reduce the risk of them getting injured or being forced out of the game early. Its important to balance pushing for strikeouts with saving energy for later innings. How Can You Monitor Pitch Count? In MLB The Show 26, you can easily keep track of your pitchers pitch count using the in-game interface. The pitch count is displayed at the top of the screen during each at-bat and is updated every time your pitcher throws a pitch. To ensure your pitcher stays fresh, monitor this count closely. For example, if your pitcher has thrown 75 or more pitches by the 6th inning, it's probably time to think about making a pitching change. By the 8th inning, most pitchers should be at 100 pitches or fewer to avoid wearing them down too much. What Are the Risks of Throwing Too Many Pitches? The biggest risk of overworking your pitcher is their stamina, or lack thereof. When stamina runs low, your pitchers pitches become less accurate, and their speed decreases. This not only increases the likelihood of getting hit but also reduces your ability to get the strikeouts you need to close out innings. Another factor to keep in mind is pitch selection. A tired pitcher may start to miss their spots or throw more hittable pitches, especially if theyve been using a variety of pitches like sliders, curveballs, or change-ups to get batters out. These pitches require more energy to throw effectively. Therefore, trying to control the game with a tired pitcher can lead to more mistakes, allowing your opponent to take advantage of the situation. When Should You Consider a Pitching Change? If your pitchers stamina is running low, its a good idea to start thinking about a pitching change before they get into trouble. Here are some signs that it might be time to pull your pitcher: Pitch Count: As mentioned earlier, around 75-80 pitches in the 6th inning is a good indicator. If theyve thrown over 100 pitches by the 8th inning, its time to make the switch. Stamina Gauge: If the stamina bar is nearing empty, your pitcher will start to lose effectiveness. If you see this happening early in the game, it's best to start considering a change. Performance: If your pitcher is beginning to give up hits or walks, or is struggling to find the strike zone, its a sign theyre getting fatigued. In MLB The Show 26, you have multiple options for relieving pitchers. Depending on your strategy, you may want to choose a power pitcher who can throw hard and fast to close out the game or a more tactical pitcher who can throw off-speed pitches and induce ground balls. How to Save Your Pitcher's Energy Without Sacrificing Performance You dont always have to push your pitcher to the limit to get the job done. Here are a few ways to manage pitch count effectively without sacrificing too much performance: Pitch Smart: Avoid throwing too many unnecessary pitches. This includes trying to be too fine with your pitches, aiming for corners too often, or wasting pitches on non-threatening batters. Get ahead of hitters early, and avoid deep counts. Use Your Bullpen Wisely: Make sure you have a solid bullpen ready. You dont want to run into a situation where your starter is burned out and you dont have any good relievers to step in. Keep a few fresh arms in the bullpen and rotate them regularly to avoid injuries. Mix Up Your Pitches: Vary your pitch selection to keep the batter guessing. Dont just rely on your fastball, or hitters will start timing you up. Using a combination of breaking balls, off-speed pitches, and well-timed fastballs can help you conserve energy and maintain control throughout the game. Take Advantage of the Quick Counts: If you're in a situation where you need to conserve pitches, consider using the Quick Counts feature in MLB The Show 26. It speeds up the at-bats and reduces the overall number of pitches you have to throw, which can help save your starters energy. What About Fatigue and Injuries? Fatigue is a natural consequence of throwing a high pitch count. In MLB The Show 26, a fatigued pitcher can still throw but may lose control, accuracy, and velocity. Over time, this increases the chance of errors and could put your team at a disadvantage. If a pitchers stamina is nearly depleted, it is also more likely that they will be injured in the game. So, keeping an eye on their stamina and making the change early is key. For example, if youre playing with a pitcher who has already thrown 100 pitches, and you notice their stamina is low, be prepared to make a change. Its better to be cautious than risk an injury, which could impact your rotation in future games. How Can MLB The Show 26 Stubs Help? While managing your pitch count effectively is an important part of the game, another element you need to consider is your team's resources. Using MLB The Show 26 stubs to purchase packs or upgrades can help you improve your teams overall roster, including your bullpen and starting rotation. This gives you more options for pitching depth and the ability to rotate players effectively, which can ultimately lead to more successful pitch count management throughout the season. Managing your pitchers pitch count in MLB The Show 26 is an essential part of building a successful pitching strategy. By keeping a close eye on the pitch count, being mindful of stamina, and knowing when to make the right pitching change, you can avoid fatigue and injuries and keep your pitchers performing at their best. Its also important to balance aggressive pitching with smart strategy, making use of your bullpen and resting your key players when necessary. By doing this, you can lead your team to success on the mound and help avoid unnecessary losses.
11
« en: Marzo 01, 2026, 07:40:17 pm »
1. What Are the Best Farming Areas for Materials? Different regions in Aion 2 are known for specific resources. To farm effectively, you need to know where to go for what you need. There are various ways to locate farming hotspots for materials: you can rely on in-game maps, player recommendations, and online resources that detail specific farming zones. Heres how to approach farming based on the type of material you need: a. Basic Crafting Materials For the basic resources like ores, wood, and plants, your best bet is to stick to low-level farming areas. These are often densely packed with resource nodes and are relatively safe for solo players. You can farm these resources on the side while completing quests, making the most of your time. Low-level zones in Aion 2 will have nodes respawning quickly, so you wont need to travel far between gathering spots. b. Rare Materials and Advanced Resources For rarer materials such as enchanted metals or gemstones, higher-level zones will be required. These areas tend to have fewer resource nodes, but the resources are much more valuable. Keep in mind that farming in these regions often comes with increased risk, as the mobs in these zones tend to be tougher. Be sure you are well-prepared for combat or consider bringing a group along to maximize efficiency. c. Resource-Specific Zones Certain zones are better for farming particular resources. For example, certain dungeons and regions in Aion 2 are specifically designed for farming high-level crafting materials. These zones may require group content or at least be safer with the right combat skills, so make sure to plan your farming route based on the materials you need. 2. How Do I Farm Efficiently Without Wasting Time? The key to efficient farming in Aion 2 is maximizing your time spent gathering and minimizing downtime. Heres how to farm in an efficient and systematic manner: a. Use the Right Tools and Abilities In Aion 2, your character's abilities and tools are crucial for farming success. Crafting and gathering abilities play a large part in making your farming experience more efficient. Make sure you have the best gathering tools and abilities for the resources you're after, such as mining picks for ores or herbalism kits for plants. If youre in combat-heavy zones, ensure you have the right skills to handle enemies while gathering. b. Plan Your Routes Mapping out your farming route ahead of time will save you a lot of time. If you know which zones to visit for specific materials, you can farm those zones in a cycle. For example, you can visit one area for ores, move on to another for plants, and finish your cycle with a rare material zone. Using your map effectively will help you optimize your farming and reduce unnecessary travel time. c. Dont Overfarm While its tempting to gather as much as you can, overfarming can sometimes be counterproductive. Resource nodes are limited, and constantly gathering in a single spot can lead to diminishing returns. Instead, focus on keeping a balanced approach, rotating between different zones, and allowing nodes to respawn. d. Utilize Farming Boosts and Potions Many farming areas have items and boosts that will help you gather more resources faster. Potions that increase gathering speed, equipment that enhances resource yield, and even special event buffs can make your farming efforts far more productive. These are especially useful for rare material farming or when you're under time constraints. 3. How Can I Use Aion Kinah to Speed Up My Progress? In Aion 2, Aion kinah plays a major role in getting upgrades, materials, and consumables that can enhance your farming experience. While gathering materials is crucial, sometimes buying items from other players or NPC vendors can save you significant time and effort. Heres how to effectively use kinah in the game: a. Buy What You Need If youre farming for materials but cant seem to get enough, consider buying them with kinah from the marketplace or other players. This can be a more efficient option if youre aiming for a specific item and dont have the time to farm for it yourself. Additionally, you can purchase rare materials that are hard to find, so you dont waste time looking for them. b. Invest in Gear and Tools Good tools and gear can make a big difference when farming. Buying higher-quality gathering tools, gear that boosts your resource yield, or potions that increase your farming speed will pay off in the long run. Having better equipment also means you can spend less time worrying about combat and more time gathering. c. Use Kinah for Crafting and Upgrades After youve gathered enough resources, you can spend kinah to craft or upgrade your gear. The crafting system in Aion 2 relies heavily on the combination of resources, but if you find yourself short on some materials, purchasing the missing components with kinah can speed up the crafting process. This way, you can enhance your gear more efficiently. d. Buy Consumables There are a variety of consumables in Aion 2 that can improve your farming experience. These might include stamina potions, buffs for increased drop rates, or items that increase your combat efficiency. You can buy these consumables with kinah, making them a good investment for long farming sessions. 4. How Do I Handle Competition from Other Players? One of the realities of farming in Aion 2 is the competition. Popular farming areas, especially those that contain rare resources, can become crowded with other players trying to gather the same materials. Here are some ways to handle this: a. Time Your Farming Certain times of day might be less crowded for farming. If you're able to farm during off-peak hours, you'll have an easier time gathering resources without competition. Keep an eye on when players are least active in your region. b. Join a Farming Group Many players opt to farm in groups, as it increases efficiency and provides protection against aggressive mobs. You can join or create a group dedicated to farming specific resources. A group farming effort is usually faster than farming alone, especially in high-risk zones. c. Move Around Frequently If a farming spot becomes overcrowded, dont hesitate to move to a different area. Overcrowded zones can make farming less efficient, so its important to stay flexible. Having multiple farming routes planned out can help you avoid waiting for respawns or competing with others for resources. 5. What Should I Do with the Materials I Gather? Once you've farmed enough materials, you need to decide what to do with them. Depending on your goals, you can: Craft Equipment: Use materials to create new gear or enhance existing equipment. Upgrading your gear is often the best way to improve your characters performance. Sell on the Marketplace: If you have extra resources or if youve farmed items others need, you can sell them on the marketplace for kinah. Store for Future Use: If you dont need certain materials immediately, store them for future upgrades or crafting projects. Farming for materials in Aion 2 is a critical part of progressing your character and upgrading your gear. With the right knowledge, tools, and strategies, you can make your farming efforts much more efficient. Dont forget to use Aion kinah wisely to purchase items or materials you need, and always keep an eye on competition to avoid wasted time. With persistence and smart planning, youll be well on your way to gathering the resources you need and upgrading your gear for the challenges ahead.
12
« en: Febrero 27, 2026, 08:52:50 pm »
What Are FH6 Credits, and Why Do You Need Them? Credits in Forza Horizon 6 are the in-game currency that allows you to buy new cars, purchase car upgrades, and unlock various features like festival expansions or cosmetic items. Early in the game, credits will be crucial for getting better cars and progressing through events. Without them, you might find it harder to keep up with the games increasing difficulty, especially as you move from beginner to intermediate levels. How Can I Safely Farm Credits in Forza Horizon 6? There are multiple ways to earn credits, but some are more efficient and safer than others. Some methods, if not done carefully, can lead to account suspension or unnecessary risks. Below are some strategies that are effective and reliable for new players. 1. Completing Daily and Weekly Challenges One of the easiest ways to earn credits without taking on too much risk is by completing the daily and weekly challenges. These tasks are designed to fit into your regular playthrough and encourage you to explore different aspects of the game, such as racing, driving style, or car upgrades. Why it works: These challenges give you rewards that often include credits, cars, and wheelspins (which can also grant you credits and other prizes). Completing challenges provides a steady, reliable source of credits without any risks. Tip: Set aside a few minutes each day to complete the daily challenges, as these can be accomplished without requiring any major effort. Weekly challenges typically offer higher rewards, so make sure to prioritize them during the week. 2. Participate in Horizon Events Horizon events are races that you can participate in across the various biomes of the game world. These events are typically divided by difficulty level, and higher-level events often yield more credits as rewards. Completing races, especially on harder difficulty levels, will result in better payouts. Why it works: Racing in Horizon events gives you a chance to win large amounts of credits, depending on your performance. You dont need to grind for hoursjust doing a few events a day can net you a fair amount of credits, and you can make use of rewards like wheelspins along the way. Tip: Focus on the event types that you enjoy, and consider using higher-level cars to maximize your earnings. Playing solo and racing at the highest difficulty settings can also increase your earnings. 3. Wheelspin Rewards Wheelspins in Forza Horizon 6 offer a chance to win not only cars but also credits. Although the chances of landing a high number of credits might seem low, wheelspins are worth investing in because they can sometimes yield large payouts. You can earn wheelspins by progressing through the game, completing challenges, or simply buying them from the in-game shop. Why it works: Wheelspins are fun to use and can give you significant rewards. They provide a low-risk option for credit farming, especially if youre using your earned rewards from other activities to buy them. Tip: Make sure to spend your wheelspins strategically. Its often better to spend them when you have a higher chance of winning the credits, such as during special events or seasonal festivals. 4. Seasonal and Festival Rewards Each season in Forza Horizon 6 introduces a set of challenges and events tied to that particular season. These events often offer seasonal credits as part of the rewards for completion. Additionally, the games festival system rewards you for maintaining high levels of reputation, which in turn leads to better credit payouts. Why it works: Seasonal events give you rewards specific to the time of year, which often include higher credit payouts. They are structured to encourage regular participation, so its a great way to keep earning as you go. Tip: Stay on top of the seasonal changes and participate actively. Make sure to check the festival playlist to see which challenges you can complete each week. 5. FH6 Credits Safe PurchaseIf you prefer a more direct approach to acquiring credits without spending all your time farming, you can look into FH6 credits safe purchase options. These are services or in-game mechanisms that allow you to buy credits in a secure, legitimate way. Keep in mind that this option should always be done through official game channels to ensure your account remains safe. Why it works: If you're in a hurry or want to avoid the grind, purchasing credits directly can be a quick solution. Its a low-risk option when done through the official game store, ensuring that your account is protected from fraudulent activities. Tip: Always check for special discounts or events where credits might be on sale. Purchasing credits during a sale can help you maximize the value of your money. 6. Auction House Flipping The Auction House in Forza Horizon 6 allows players to buy and sell cars. You can use this feature to your advantage by purchasing cars at a low price and reselling them for a higher price. The key to success here is knowing the market and timing your purchases. Why it works: If you learn the trends in the Auction House, you can easily buy cars at a low price and sell them for a profit. This method is relatively safe if you take your time and don't rush into buying cars that are overpriced or overvalued. Tip: Check out the Auction House frequently to look for undervalued cars that you can flip for a profit. Make sure to factor in the auction fees and costs when calculating your margins. 7. Online Multiplayer Races If you enjoy playing with others, online multiplayer races can be another way to earn credits. These races often feature higher payouts compared to regular events, and you can compete against skilled players, which can be a great way to hone your racing skills while earning credits. Why it works: Online races offer competitive rewards and can sometimes give you larger payouts if you perform well. Competing in multiplayer races is a fun way to build your reputation and earn rewards while socializing with other players. Tip: Try to focus on events where you feel most comfortable, and practice until youre ready to compete at a higher level. Participating regularly in these races will steadily increase your credits. Farming credits in Forza Horizon 6 can be both fun and rewarding, especially when you know the right methods to use. Whether you're completing challenges, participating in Horizon events, using wheelspins, or even purchasing credits safely, there are a number of strategies you can adopt to build your wealth in the game. As a new player, its important to balance your time between fun and efficiency. The best way to farm credits safely is by following the tips outlined here, sticking to in-game methods, and avoiding any shortcuts that may put your account at risk. With these strategies in hand, youll be well on your way to unlocking the best cars and upgrades Forza Horizon 6 has to offer, while enjoying the thrill of the open road. Happy racing!
Páginas: [1]
|
